A Complete Guide for Better Results and Smart Buying Decisions
When it comes to delivering smooth finishes, precise shaping, and faster salon-level results, understanding nail drill tips uses can completely change your nail routine. Whether you are a beginner, a home user, or a professional nail technician, knowing how each nail drill bit works—and how to use them properly—can elevate both the quality and efficiency of your work.
This article is a complete, marketing-friendly yet professional nail drill tips guide designed to help you:
Understand the real functions of each drill bit
Choose the right drill and tips for your needs
Avoid common mistakes that damage nails
Maintain tips for longer life and better hygiene
Identify what features matter when buying a professional drill
Let’s walk through everything you should know before your next manicure session.
1. What Are Nail Drill Tips and Why They Matter
Nail drill bits (or nail drill tips) are the interchangeable heads used on an electric nail drill. Each bit is designed for a different purpose—from removing gel polish to refining cuticles or shaping acrylic extensions.
Understanding nail drill tips uses helps you:
Work faster with less effort
Avoid over-filing or causing heat friction
Produce cleaner results with professional precision
Extend the life of enhancements such as gels and acrylics
When the right bit is paired with the right technique, even beginners can achieve consistent results.
2. Essential Nail Drill Tips Uses (Complete Breakdown)
Below is a focused, practical guide to the most important drill bits and what they do. This section is optimized for both SEO and readability.
2.1 Ceramic Bits — For Gel Removal and Heat Reduction
Ceramic bits are highly efficient at removing gel polish or extensions without generating as much heat as metal bits.
Best for:
Gel polish removal
Hard gel debulking
Thick acrylic filing
Why they matter: Ceramic dissipates heat and is beginner-friendly.
2.2 Carbide Bits — For Professionals and Fast Debulking
Carbide bits are stronger and sharper, ideal for nail techs who need precision and speed.
Nail drill tips uses include:
Removing acrylic
Smoothing thick product layers
Reducing length
They come in different grits; beginners should start with fine or medium.
2.3 Diamond Bits — For Cuticle and Natural Nail Work
Diamond bits don’t cut—they grind gently—making them ideal for delicate tasks.
Used for:
Lifting and cleaning cuticles
Refining nail walls
Prepping natural nails
If you want clean, Russian-style cuticle prep, this is the bit to master.
2.4 Mandrel + Sanding Bands — For Beginners
The sanding band is the safest and most basic bit.
Nail drill tips uses include:
Natural nail prep (fine grit)
Gel polish surface removal
Light shaping
Disposable and hygienic—great for salons.
3. A Complete Nail Drill Tips Guide for Beginners
For newcomers, the goal is simplicity + safety. Start with this basic routine:
Step 1: Prep with a fine sanding band
Buff the shine off the natural nail with low speed (3,000–5,000 RPM).
Step 2: Use a small diamond bit for cuticles
Clean dead skin gently—no pressure.
Step 3: Remove product using ceramic or carbide bits
Start at medium speed (10,000–15,000 RPM), depending on gel or acrylic thickness.
Step 4: Shape and refine
Use a safety-bit (rounded top) to avoid nicks.
This simple flow will help avoid overheating, over-filing, and ring-of-fire issues.
4. Choosing the Right Nail Drill (What Really Matters)
Choosing a good drill is just as important as choosing the right bits. Here are the features that matter most:
✔ Stable Power Output (No Vibration)
Vibration causes uneven filing and hand fatigue.
✔ Adequate RPM Range
20,000 RPM is fine for beginners, but professionals often prefer 30,000–35,000 RPM.
✔ Quiet & Low-Heat Motor
A quality motor makes a huge difference in comfort.
✔ Portable Size with Strong Torque
Small drills are popular, but you must ensure the torque is strong enough for gel and acrylic removal.
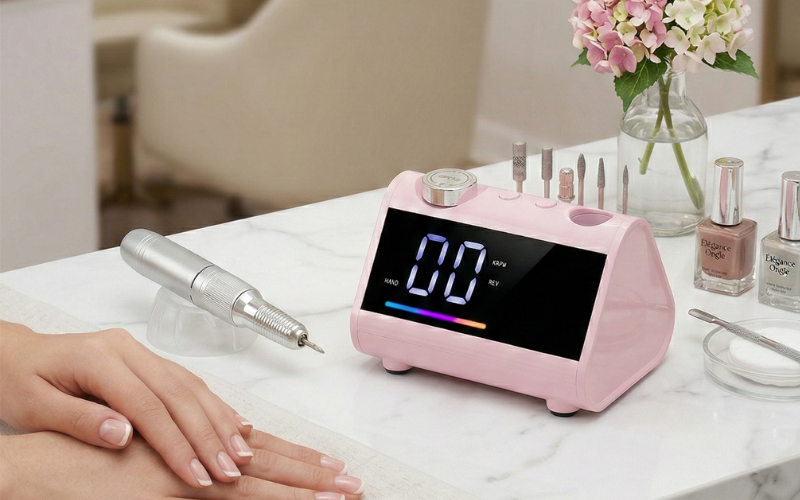
A good example of a compact drill with stable torque and smooth performance is the ZS-239 Portable Nail Drill, which balances portability with professional strength.
It’s lightweight, beginner-friendly, and designed for both home users and nail artists.

5. Common Mistakes When Using Nail Drill Tips (and How to Avoid Them)
Even skilled users make mistakes. Here are the most common ones and how to fix them:
❌ Mistake 1: Using High Speed on Natural Nails
This causes burning sensations and nail thinning.
Solution: Keep it under 5,000 RPM.
❌ Mistake 2: Staying Too Long in One Spot
Creates heat spikes and discomfort.
Solution: Keep the bit moving smoothly.
❌ Mistake 3: Using the Wrong Bit for the Job
This leads to work inefficiency and poor finishes.
Solution: Follow the nail drill tips uses guide above.
❌ Mistake 4: Forcing the Bit to Work
Only results in damage and vibration.
Solution: Let the bit do the job—apply light pressure.
6. Maintenance Tips to Extend the Life of Nail Drill Bits
Well-maintained bits work better and last longer.
✔ Clean After Every Use
Use a brush to remove dust.
✔ Disinfect Metal Bits Properly
Carbide and diamond bits can be soaked or placed in a sterilizer.
✔ Avoid Dropping Ceramic Bits
They break easily.
✔ Replace Sanding Bands After Every Client
For hygiene and effectiveness.
✔ Store Bits Vertically
It prevents bending or dulling.
Good maintenance improves results and protects your drill’s motor.
7. Final Thoughts: Start With the Essentials and Build Skill Over Time
Mastering nail drill tips uses is the foundation of achieving clean, professional quality nails—whether at home or in a salon. With the right bits, the right drill, and the right technique, you can dramatically improve both efficiency and results.
This nail drill tips guide is designed to help you avoid common mistakes, choose better tools, and gradually level up your skills. Start simple, work safely, and upgrade your bits and machine as your confidence grows.