Best Nail Drill for Beginners: How to Choose and Use It Like a Pro
When you first step into the world of nail art, understanding how to use a nail drill can feel overwhelming. With the right tools and techniques, however, anyone can master salon-quality manicures at home. In this comprehensive guide, we’ll walk you through how to choose the best nail drill for beginners, how to use it safely and effectively, and how to care for it like a professional nail technician.
1️⃣ Why Choosing the Best Nail Drill for Beginners Matters
For those new to nail care, a nail technician drill can make all the difference. It’s not just a tool — it’s what helps you file, shape, and polish your nails with precision and consistency.
A beginner-friendly electric nail drill allows you to:
Smoothly remove gel polish or acrylics
Shape extensions with control
Refine natural nails without damage
Save time compared to manual filing
When starting out, your focus should be on control and comfort rather than raw power. The right drill can help you practice confidently without the risk of over-filing.
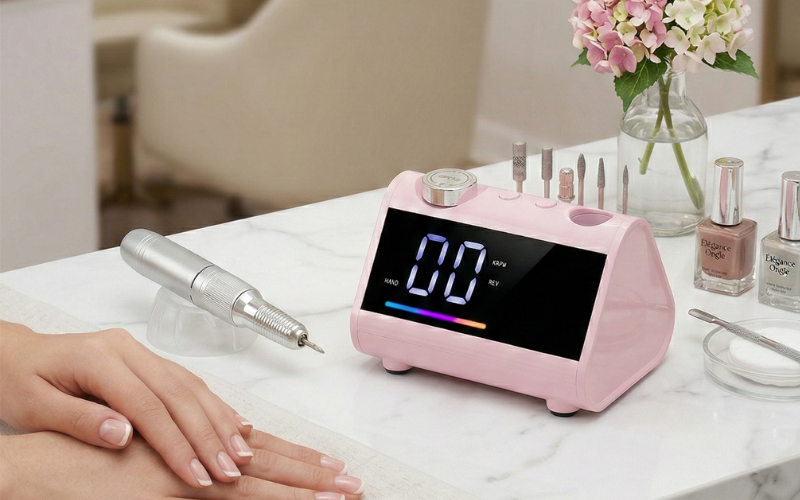
2️⃣ Understanding the Nail Technician Drill: How It Works
A nail technician drill—also known as an electric nail file—consists of a power base, handpiece, and interchangeable bits. The motor controls the rotation speed (RPM), while the handpiece directs precision.
Here are the main features to look for:
Speed control: Adjustable RPM lets you start slow and work up gradually.
Ergonomic handpiece: Lightweight and low-vibration for long sessions.
Forward/reverse switch: Ideal for left- or right-handed users.
Noise and heat control: A good drill should operate smoothly and stay cool.
Choosing a professional-grade yet beginner-friendly model ensures durability and comfort. You can browse reliable models here:
👉 Explore Zeal Shine Nail Drills
3️⃣ Electric Nail Drill Bit Guide: Types and Uses
One of the most confusing parts for beginners is understanding nail drill bits. Each bit serves a unique purpose, and using the right one can dramatically improve your results.
| Bit Type | Material | Purpose |
|---|---|---|
| Barrel Bit | Carbide / Ceramic | For shortening and shaping extensions |
| Cone Bit | Diamond | For cleaning around cuticles and sidewalls |
| Flame Bit | Ceramic | To remove gel polish or refine the nail surface |
| Mandrel + Sanding Bands | Sandpaper | For surface smoothing and basic prep |
Pro tip: Always start with fine grit bits when learning. Coarser bits remove material faster but are harder to control.
4️⃣ How to Use a Nail Drill for Beginners – Step-by-Step
If you’re wondering how to use an nail drill safely, follow these steps to build confidence and precision:
Prepare your workspace – Clean your tools, set up proper lighting, and ensure good ventilation.
Choose your bit – Start with a fine sanding band or cone bit.
Set your speed – Begin at a low RPM (5,000–10,000) and increase only when comfortable.
Hold the handpiece correctly – Keep it like a pencil, resting your hand on a stable surface.
Work in smooth motions – Move the bit lightly across the nail, never pressing down.
Switch directions – Use forward/reverse depending on your dominant hand.
Cool and clean – Pause often to prevent heat buildup and wipe off nail dust.

Learning how to use the nail drill effectively comes down to consistent practice. Start slow and focus on technique before speed.
5️⃣ Common Mistakes Beginners Should Avoid
Even the best beginners’ nail drill can cause problems if used incorrectly. Here are a few common mistakes to watch out for:
Using high RPMs too early: Always start slow.
Applying too much pressure: Let the bit do the work.
Using the wrong bit: Match bit type to the task.
Ignoring heat: Constant contact creates friction burns.
Skipping cleaning: Dust buildup reduces motor life.
Understanding these pitfalls will make your learning curve much smoother.
6️⃣ How to Maintain and Clean Your Electric Nail Drill
Proper maintenance ensures long-term performance and hygiene. After each session:
Remove and disinfect bits.
Use a small brush to remove dust from the handpiece.
Store your drill in a clean, dry place.
Once a week, check for loose parts or abnormal vibration. If your drill feels hot or noisy, clean the vent or replace worn bits.
7️⃣ Choosing the Best Nail Drill for Beginners – What to Look For
When buying your first drill, look for these key features:
Power: 20,000–35,000 RPM is ideal for beginners.
Comfort: Ergonomic handle and lightweight body.
Noise & heat control: Essential for longer sessions.
Safety lock bits: Prevent slipping during bit changes.
Warranty and service: Always choose a trusted supplier.
8️⃣ Final Tips – From Beginner to Nail Technician Level
Mastering how to use a nail drill for beginners takes patience, but once you develop control, you’ll achieve salon-level results.
Always remember:
Use gentle pressure.
Keep your bits clean.
Practice on artificial nails before natural ones.
Watch your hand position and lighting.
If you often use UV lamps during your nail routine, you may also enjoy this post:
👉 UV vs LED Nail Lamp Differences Guid
With the right electric nail drill, safe habits, and consistent practice, anyone can perform like a true nail technician — from home or in a salon.